Sawyer Filter Assembly and Maintenance Are Relatively Simple
SAWYER FILTER ASSEMBLY
Sawyer Filter assembly and maintenance can be accomplished by pretty much anyone. There are no more than 5 or 6 parts, and tools required are absolutely minimal.
A hole cutter is included with each assembly kit. The hole that must be drilled in the reservoir bucket can be drilled by hand. No power tools are needed.
Step 1 - Make sure that all of the assembly kit components are present and in good condition.
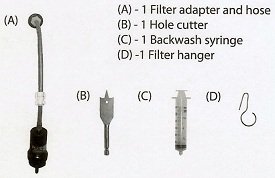
There should be four items in each assembly kit.
A) 1Filter adapter and hose. This includes an adapter that will attach to the reservoir bucket, a black plastic housing that contains the hollow fiber membrane filter element , and a flexible tube that connects the two.
B) 1 hole cutter for cutting the hole in the plastic reservoir bucket,
C) a plastic syringe used for periodic back-flushing of the filter element, and
D) a wire filter hanger for securing the filter element when not in use.
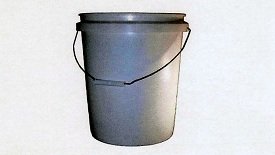
Step 2 – You will need to find a clean plastic bucket to use as a reservoir for water that is to be filtered.
This is commonly a plastic 5-gallon bucket, but other sizes of container can also be used. A larger container will hold more water and also increase the flow rate of the filter.
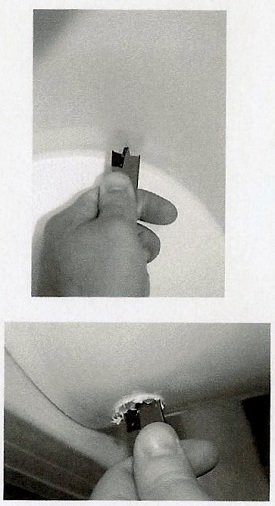
Step 3- Using the hole cutter, manually cut a hole in the plastic bucket that is 13/16” (22mm) in diameter.
Do this by twisting the hole cutter by hand. The hole should be about 1.5” (38mm) from the bottom of the bucket.
Any sediment that is in the water poured into the bucket will settle at the bottom, below the opening, and won’t enter the flexible tubing and filter element.
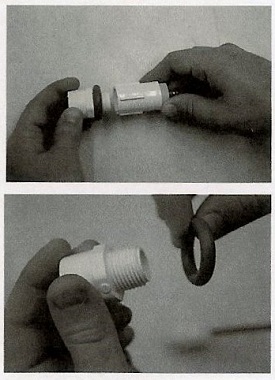
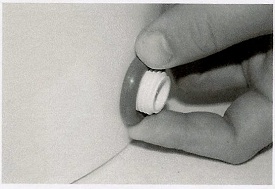
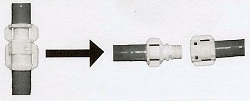
Step 4 – The adapter is a plastic PVC fitting, made from a threaded male fitting that screws into a female fitting.
There is a rubber “O” ring between them. The female part of the fitting holds the flexible tubing and the filter element.
Unscrew the male fitting from the female fitting and remove the “O” ring from between them.

Step 5- The male part of the adapter fits through the hole that was drilled through the bucket.
Insert the threads through the bucket so that the threads are protruding to the outside of the bucket.
Step 6 – Place the “O” ring over the protruding threads and replace the female part of the fitting by screwing it onto the male threads.
The “O” ring will be squeezed between the female part of the adapter and the bucket to prevent water from leaking out. You now have a complete filter.
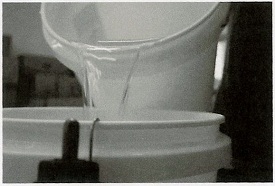
Step 7 – To get clean water, simply pour the water you want to filter into the reservoir bucket.
If the filter element is held below the bottom of the bucket, clean water will start to flow out of the black filter housing.
It is important to always filter water INTO A CLEAN RECEPTACLE.
Letting clean water flow into a dirty container defeats the purpose of having a filter. Clean, dedicated receptacles are an important part of any household water storage regiment.
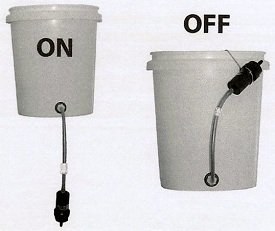
Step 8 – To stop water from flowing from the filter, simply raise the filter housing above the bucket.
Use the filter hanger included in the assembly kit to secure the filter in the “up” position haging it on the side of the bucket.
Sawyer filter construction is easy!
Sawyer Filter maintenance is easy too.
SAWYER FILTER MAINTENANCE
As mentioned in the "Introduction to Sawyer Filters"you should avoid pouring turbid water through your Sawyer filter. A couple of easy options to pre-filter and clear out sediment are recommended.
The more turbid the water is that you are trying to filter, the more often you will have to perform the following cleaning/maintenance steps.
They are not difficult. You just have to be sure to do it to keep your filter working well and keeping your water clean and safe.
So, the cleaning and maintenance steps are as follows:
Step 1 – Determine if your filter needs cleaning.
You will know that your Sawyer filter needs cleaning because the flow rate will slow down noticeably. As mentioned above, this occurs over time, regardless of the turbidity of your water source.
However, pre-filtering will extend the time between cleanings and, ultimately, extend the life of your filter.
Step 2 – Set aside some clean water to use later.
Be sure to set aside about 1 liter of CLEAN water. This will be used later in the cleaning process. The water you set aside needs to be free of contaminants, so be sure you set aside freshly filtered or disinfected water; about 1 liter will do.
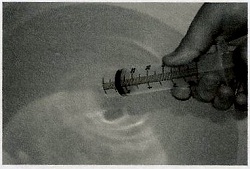
Step 3 – Fill the plastic back-flush syringe.
This is where the plastic syringe that comes with the assembly kit comes into play.
Put the tip of the syringe into the CLEAN water that you have set aside, and pull back on the plunger, filling the plastic syringe with the clean water.
Step 4 – Empty the plastic reservoir bucket and remove the filter from the hose.
There is a quick release fitting that connects the black filter housing to the rubber tubing.
Empty any water out of the bucket, rinse out any sediment out of the bucket, and disconnect the filter from the rubber tubing at the quick release fitting.
Step 5 – Repeating what was said in Step 1, DO NOT use contaminated water in the plastic syringe. We are trying to clean the filter, so we wouldn’t want to use contaminated water to do that.
There may be instances where there really is not any clean water around to use for back-flushing, and no way to clean it sufficiently.
In this case, if you must use dirty water to back-flush the Sawyer filter,do not drink the first liter of water that you subsequently run through your newly cleaned filter.
Let at least 1 liter flow through your filter first, and discard it.
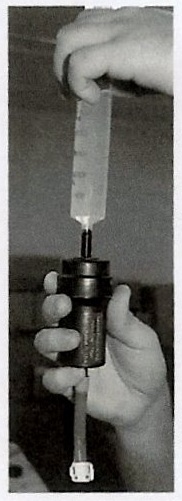
Step 6 – Back-flush the filter
With the filter disconnected from the rubber tubing, place the end of the plastic syringe into the opening at the bottom of the black plastic filter housing and squeeze water out of the syringe and into the filter.
This forces clean water backwards through the filter, flushing sediment and contaminants out the other end.
Repeat this process several times until the water that comes out is clear and clean. Discard the discharge water properly.
Following these easy steps will keep your Sawyer filter working and your drinking water safe and clean.
Return to "Intro. to Sawyer Filters" from "Sawyer Filter Assembly and Maintenance